Sunday, April 14, 2013

Ta Dah! The Big Reveal... Happy Summertime Butterfly Garden Bed Pillow


I finished my Happy Springtime Butterfly Garden pillow!  Ta Dah!!!!  I had absolutely no idea what I was going to make when I started.  I only knew that it was going to be cream colored and have flowers on it to break up the design with all the starbursts on the other pillow covers and the blanket I made for my bed.  I ordered a few books with flowers in them to crochet but they did not arrive in time and I got impatient.  That is when I was inspired by the flower wall hanging on Attic 24 but without all the doodads to make it hang and for it to be a wall decoration.  You can view the pattern here.   The two flowers on the left I used the chain 41 for the stem like Lucy wrote in her pattern.  The taller one on the middle right was a chain 51 and the one on the far right I chained on 31 for the stem.  This way I would have various heights.   It was a fun project and a great way to use up scraps.  For the base of the pillow I measured the pillow seam to seam and once I knew the width, I then did the following to add texture and thickness so the weight of whatever I would sew on would not droop.  I alternated a single crochet with a double crochet (every other stitch) all the way across.  Then when I turned, where there was a single crochet on the previous row, I made a double crochet, and the next stitch where there was a double crochet on the row below, I made a single crochet.  It is the crochet version of knit 1 pearl 1, but in this case it is crochet single, crochet double, repeat repeat repeat.  


Once the pillow front was the same size as the pillow I was making it for, I just double crocheted and continued on until I was just 1/2 from the middle measurement (in this case 9 inches) and then I single crocheted for about another inch and a half.  It is important to make several rows of single crochet to give it support for the buttons when they go on..  Then on the other end I did the same thing so that the single crochet lined up, and it was about 6 rows, so for the button holes I would chain 3 and skip those 3 stitches and crochet in the next stitch to make the button hole.  Then I just made 3 more rows of single crochet.  You will have to measure to find where the middle and half of each middle for your button placement.  I then scalloped by 7 double crochets in a space, skip 2 spaces, slip stitch, skip 2 and then repeat the 7 double crochets again till you get to the end.  I had to make a half scallop by just making 4 double crochet stitches in the 2nd to the last stitch and then a double crochet in the end stitch to square it off.  


I made simple little butterflies that are in the book Crochet Garden by Suzann Thompson.  (It came yesterday and I got busy making those for the pillow, and I can't wait to review the books!  So cute!).  Her book is available on amazon.com

I fastened buttons on the upper wings.  I thought about doing all the wings but it was just too busy doing it that way and the butterfly lost detail. So only 2 buttons.  I also put big buttons in the center of each big flower.


I had a package of little bee buttons and thought they would go perfectly with this project.  There were 7 in the package of various colors.  I placed them all around the pillow at random to give it just that little extra detail.


When I stitched all the flowers and buttons and butterflies on with invisible nylon thread, I did it before sewing the side seams of the blanket.  This made it a lot easier to sew because I did not have to worry about sewing the two sides together in an accident.  Also, I could monkey about with it while it was laying flat this way.  It really helped with placement.  Once I completed all those steps, I was able to pin it together, right sides facing and lining up the back area so the single crochet areas lined up.  Then I whip stitched it together and then sewed the buttons on the back.   Viola!  Then I had a finished happy pillow :)  


Let's take one more look at the pillow on my bed shall we? Isn't it just adorable and happy?  Dear reader, I hope this inspires you to go out and get creative and have fun as that is my entire mission with doing this blog.  Please let me know what you think in the comments section.  I seldom ever hear feedback here on this blog that I don't know if I am the only one enjoying these projects with sharing them with you.  Feedback inspires me to create more and post more ideas and fun projects.  Without it, I feel like I am just blogging to myself and it takes a lot time and energy to create blog posts.  So please let me know!

Hope you are all having a wonderful day today and I hope you enjoyed this pillow.  

Until next time......xxxxxxxxxxxx


Kimchi Recipe Time.


We love Korean food in this household.  I am always surprised at how expensive the little jars in the grocery store are and to tell the truth, not very good.  Years ago I had several Korean neighbors that taught me how to make kimchi.  There are as many variations of kimchi as there are people in Korea I think, as each family has their own special secret blend/recipe.  This is how I make it at my house.  I make it with available ingredients from my grocery store.  Sometimes when I am feeling fancy, I make a special trip to the Asian store and get Asian pear and other ingredients to make it fancy.  But, for every day or quick pretty decent kimchi, this works in a flash.  That doesn't mean that the initial ingredients for the Korean pepper and such does not require a special trip to the Asian market, but once you have that, you are good to go for a very long time.    Let's get started shall we?  

Ingredients

2 large fresh Chinese (Nappa) cabbage, dark green outer leaves removed
1 cup sea salt (available cheap at your Asian grocer and without iodine, this is important)
3 heaping tbsp rice starch powder (regular kind) or 1-2 heaping tbsp glutinous rice starch.
2 cups water
2-3 large to medium carrots or 4 medium to small carrots.
1/2 cup Korean chilli powder – aka gochugaru (not flakes, look for it at your local Korean grocery store)
1 cup Korean chili flakes
1/2 cup fish sauce, or ½-1 teaspoon of preserved shrimp, or 6 whole oysters finely chopped (your choice)
1 tbsp white sugar
2 bunches or spring onions, washed sliced 5-10 cloves of garlic, crushed (or to taste, I like a lot so I use an entire head of garlic)
1 inch knob of ginger, grated
1-2 teaspoons of toasted sesame oil (optional)


Chop cabbage into about 1 1/2 to 2 inch slices so that it is bite size.  Place in large pot and mix with the 1 cup of salt.  Make sure it is sea salt and not the iodized salt from the grocery store.  I purchase the natural style sea salt for very cheap in 10 lb bags at my Asian grocers.  As a matter of fact, that is all we use for salt now.  It has no flow agents or other added ingredients.  It is much tastier and it works a lot better in kimchi.  Once this is mixed together place to one side for about 1/2 hour or so while you prepare the rest of the ingredients.


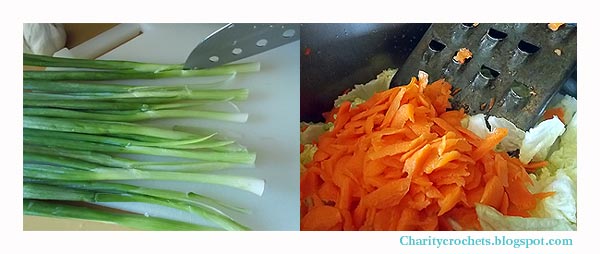
Chop up some scallions into 1 inch pieces and put to one side.  Be sure to slice them down the middle on the heads so you don't end up with big pieces. Set them to one side in a bowl for later.   You can either grate the carrot or you can cut them into fine matchsticks.  I used this giant grater that was my grandmothers and is very old.  Just use whatever is available.  However, a regular size cheese grater is too fine.  You want some texture.   Add the carrots to the salted cabbage and mix around with your hands. 


In a sauce pan whisk your 2 cups of water with the rice flour.  Heat until very thick and bubbly.  It should be almost like a pudding in thickness.  Set to one side and let this cool while you prepare the next step.


You will need to choose which type of fish type ingredient you need to make this.  I am using the shrimp paste today.  Do not fret, it will not make this fishy tasting but it goes a long way in aiding the flavor.  Some use about 1/2 cup of fish sauce and others use about 1/2 dozen of chopped up fresh raw oysters and I commonly use some sort of shrimp paste.  (image 1)

Next I put an entire head of garlic that has been peeled and the one inch hunk of ginger root into my mini food processor.  If you don't have one, don't worry, you can just chop and mince finely with your knife or in a blender will work too.  Next I add about 1/2 to 1 teaspoon of the shrimp paste. (image 2) and then I add just a little bit of the rice flour mixture that I boiled to this to aid in chopping and blending the garlic and other ingredients like the sugar, etc..  Give it a good whirl until well blended. (image 3).

I like to use 2 types of chili pepper.  It comes crushed and also powdered.  They are the same thing, except one is finer ground.  I like to use both as the finer adds color but the flakes add texture and interest.  Add a little of both or just the powdered or just the flakes if that is all you have on hand.  I gave a guideline in the recipe as to how much to add, but really this is to your taste.  Some years the pepper flakes and powder is more mild than others.  I would use caution and keep adding to your tastes.  This pepper is not super hot so don't be afraid of it.  I purchase this at the Asian grocery.  You MUST use the Korean pepper flakes as if you use something else it will ruin your kimchi.  This is a different pepper flake than the type you purchase in the supermarket for putting on pizza for instance, just as the powder is not the same thing as paprika.  (image 4)

Add the chili powder to the rice flour paste and whisk in with the other ingredients you just pulverized (image 5 & 6).  Set to one side.


After about 1/2 hour to an hour has passed you will notice that your really full big pot of salted cabbage has wilted and reduced down to about 1/2 the height.  You will need to wash the cabbage to get the excess salt out.  Fill your big pot with cold water and swish around like you are doing laundry by hand (image 1) and then drain (image 2).  You will need to do this about 3 times to get all the excess salt out.  Take a piece of the cabbage and taste it.  It should be slightly salty but not salty like a potato chip.   After it has drained transfer back into the pot and add about 2/3 of the hot pepper paste that you just made and about 1/2 - 2/3 of the sliced green onion. (image 3)  Mix with your hand until well incorporated and then taste.  At this stage if you removed too much of the salt you might add some, and this is also the stage to add some optional sesame oil and then mix well with your hands again. (image 4)  and then put into a container and press down well with your hands until some liquid comes to the top to cover the leaves. (image 5).  You don't want the cabbage exposed while it ferments or it can get moldy.  This is very important.  Set out on the counter in a covered container for a few days to let it ferment.  Congratulations!!!  You just made kimchi.  After a day or two move to the fridge and eat it with rice or your favorite Korean dish.   The longer you keep it the more sour it becomes.  Once it becomes too sour to eat, don't throw it out.. You can make kimchi jiggae (kimchi stew) from it.  


Bonus Recipe:  Remember that little bit of left over kimchi paste and onion from making the above recipe?  Well... Here is the bonus recipe.  Traditionally this uses pickling cucumbers but I did not have any.  I have English seedless cucumber so that is what I am using for demonstration purposes.   If using the baby cukes just leave them whole and slice down the center like in image one.  If using a big seedless cucumber like I did, just cut into about 3 inch slices and then cut an X like shown above.  Do not cut all the way down.  Cut down to about 1/2 inch remaining to keep the cucumber intact.  Then spoon some of the sea salt into the slices and let sit in a bowl and drain out (image 2).  Wash the salt out after about an hour or so (image 3)

Take the remaining scallions and paste and mix together.  Stuff the inside of the cucumbers with this mixture. Place in a container and then massage any extra left over paste on the outsides of the cucumbers. 


Sprinkle the top of the cucumbers with some toasted sesame seeds.  Place this in the fridge for a day or two and then eat.  

Now you never need to purchase store bought kimchi again and these are made from easily available ingredients without having to hunt down Asian pears, etc. each time you make it.  Once you make the initial purchase of the pepper flakes and sea salt, etc.  You will be making kimchi often.  

Bon Appetite!  

Until next time........xxxxxxxxxxx


Friday, April 12, 2013

Quick Tip: Recycling kitchen scraps.


I was in the kitchen making kimchi (I will post about that later) and remembered that if you save the heads off your green onions (or scallions if you will) and plant them they will grow new onion plants.  I did this once years ago with some scallions that were starting to go bad in the fridge and just planted them right in the ground, and they grew new ones.


After I finished cooking I took the scallions that I placed in some cold water so they don't dry out until they went into the garden.  Simply just make some simple rows and place one about every inch or two apart and then cover with soil.  Before long, if you keep them watered, they will grow new green onions.  It is a frugal way to extend those green onions that you purchase in the supermarket.  

You can also do this with carrot tops, potato peels and many other crops.  I save the seeds from many squash that I purchase and use those to grow new ones too.  Give it a try, you have nothing to lose and free crops of food to gain. 

I just thought I would share this quick tip with all of you out there in internet land.  

There goes the diet! (and how to fry oysters)


Have you ever noticed that as soon as you think about dieting, then something comes into your house to challenge that plan?  Case in point, world famous extra small Hood Canal Oysters!  We like them fried, that is not too friendly to the waistline along with tarter sauce.  Of course I had to have blue cheese dressing on my salad.  Oh well... I will try harder today.  The thing is, we will not purchase oysters any month that does not contain an "R" in it.  That means no oysters for May, June, July or August.  They are soft and mushy and spawning those months. This is the last month that we get to enjoy them until next September so I am not going to feel too guilty.  If I had the time, I would just go out to the canal myself and sit on the beach with some lemons and my trusty oyster shucking knife and eat them raw on the half shell.  I have pleasant memories of doing that more times than I can count.   If I had time to kill, I would be out there right now!

The easiest way to fry oysters is just to take some flour and add your favorite seasoning in one bowl, and some egg wash (just a beaten egg with a Tablespoon or so of water) in another.  I then dredge in the flour seasoning mixture, then into the egg, back into the flour and into a pan of hot oil (but not too hot).  I just pan fry on both sides until golden brown which is just about 2-3 minutes on each side.  That's it!  


Last night after eating I thought a quick 3 mile walk around my favorite forest paths would help settle some of the guilt from eating fried foods.  Look at this root ball clump and how nature is re-claiming it.  When giant douglas fir trees come down in a wind storm, they have very tall root balls taller than you and me together standing on each other's shoulders.  


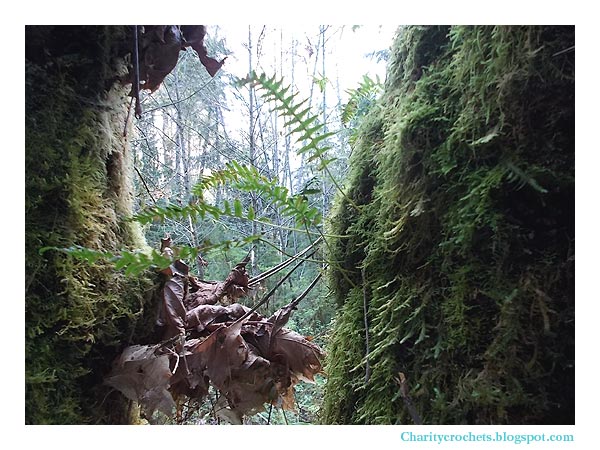
The wonderful thing about living in a rain forest is some of the cool things I witness while walking.  Look at the thick moss on this tree and from that, ferns begin to grow on the tree itself.  It is quite beautiful to look at don't you think?


And there are many types of moss.  Look at this long and hair moss that grows from the tree limbs here.  Isn't it beautiful?


While I was out walking this trillium was just asking to have it's photo snapped.  The sun came out for a little bit and this trillium was growing right in the middle of a split tree trunk that had 3 trees growing up and they were all mossy and green.  Smack in the center was this trillium and the sun came beaming through the forest cover to illuminate this one flower.  It was more beautiful in real life. 


Wild woodland violets are starting to bloom on the forest floor and cover it with a happy blanket of little yellow flowers.  I imagine being a little tiny woodland fairy or something frolicking about when I view them. They sure are a sight and just make me feel happy inside.


A sure sign that spring is here, is not the weather because it is stormy and cold with sun breaks... but instead, passing by the ball fields are groups of various baseball teams practicing for their summer leagues.  It is rather fun to sit and watch the kids clumsily play and miss catching the ball and miss hitting it with the bat when it is their turn to go up to bat.  I am sure with practice they will get better. 

Today I hope to continue to work on my crochet project so I can get that put up soon.

Until next time.........xxxxxxxxxxx


Thursday, April 11, 2013

Pillow decorating and happiness over the simple things in life


A good Thursday to all of you.  I hope all is well out in the blogging world.  My spirits are returning and I am getting back into enjoying the every day things in life again.  My decision to disconnect from social media like Facebook for a while was the right decision.  With the way of the world right now, there was just too much negative attention on all that is wrong with the world.  I want to concentrate on all that is right in the world instead...  And there are so many things that are right in the world.  

I have been playing with the flower pattern that Lucy at Attic 24 designed.  She designed it for a wall hanging but I have been playing with it to instead turn it into motifs for my pillow that will go on my bed.  I will be making them all different sizes and lengths and kind of random as far as colors go from the scrap basket.  Originally I didn't think I would do this and wanted to hold off until some of the books I ordered recently from Amazon.com came, but I am too impatient and decided to play with her design and instead of using it as a wall hanging, turn it into a motif.  I am picturing this with various size flowers and maybe some crocheted butterflies or something to turn it into a fun and festive garden pillow.  

The weather here has been dreadful and the nice warm blast we had a week or two ago with sunshine has gone into hiding.  This is perfect weather for completing such projects.


I have decided to think about things that make me happy!  I was out front with my kitty cat and watching him guard his post on the front steps.  His head moved like clockwork from side to side like watching a tennis match.  This really made me chuckle... He was so intense with his stare.  He is a great guard and takes his job so seriously.


Of course all that guarding of the property makes for a very tired and lazy afternoon nap.  I just want to curl up and sleep next to him.  It is really hard to resist going back to bed when you see a cute and adorable kitty cat all snuggled up.


My new salt mill on the right that I got for Easter from a dear friend, to match the pepper mill on the left that she purchased for Christmas for me makes me giddy.  Are they not the cutest salt and pepper mills you ever did see?  Every time I cook I think of her now.  I have them filled with whole fresh pepper corns and big grains of sea salts.  It really does making cooking a lot of fun.  I will think of Lora every time I cook.  We go way back in our friendship.  She is the friend that we were together and joined at the hip during our teen years.  Can you believe that even as dramatic drama filled teenage girls, we never once had a fight!  I can't ever remember not getting along with her ever..  A friend like that is a rare gem and a rare find.  I am very blessed not only for these salt and pepper mills but more for what they symbolize.  Life is good!


With all the cold rainy weather, hot soup has been on the menu.  I really enjoyed curling up and hooking on my pillow after enjoying a nice big bowl of French onion soup au gratin.  It is such a simple thing but oh so good and oh so comforting.  Yesterday was absolutely stormy in the morning and I already have a giant pot of clam chowder on the menu to make soon.  I purchased all the ingredients at Costco yesterday for that.  


An apple pie goes a long ways in brightening the mood around here.  There is nothing like a hot slice of pie with some tea.  I wanted to tell you all that when you roll out your pie dough and there are little bits of scraps left not to waste them!  Instead roll them out, and use a cookie cutter to make decorative shapes to place on top.  If there is enough flour on the cutting board when you roll it out, then you will be able to "glue" your shapes to the pie and decorate it.  Simply just dip your finger in some ice water and dab on the back of the shape before placing on the pie.  I then brush the pie with some melted butter and sprinkle with some sugar to give it a golden color, which makes the shapes stand out that much more.   A pretty pie makes me very happy.  

All in all, life is good.  I hope these images helped to lift your spirits as much as they have mine.  Sometimes it is just those little simple things in life that keeps me happy.  I don't wish to live in a cave and block out the world completely.  I do like to know world events and what is going on and I am actually very active with the process of democracy, but a little of that goes a long way.  I can only take so much of it and it does not serve me well to sit all day and see reminders of it and concentrate on "we are doomed, the world is one messed up place".   I like to get my news for the day and then move on.  I think one can drive themselves insane by sitting and watching the news all day long with the doom and gloom.  Well, that was what was happening to me with reading Facebook because link after link of news stories and strong opinions on world events.  It was just too much doom and gloom collectively and I was facing burn out.  I am enjoying my vacation time away from it and once again settled into the happy little things in life.  

Life is great if you can just look around you and enjoy the bounty and be grateful for what you have no matter how simple it is.  They say, a person is not grateful because they are happy, but happy because they are grateful.  I find this to be very true!  

So stop what you are doing, look around and pick 5 things you are grateful for right now, no matter how simple it is... it goes a long way in feeling inner peace and happiness.  It works for me :) 

Until next time... xxxxxxxxx


Tuesday, April 9, 2013

Pillows and more pillows, to complete the bedroom set.


Hi everyone!  I have been strangely silent here for the last 2 weeks.  I have so many things going on and a lot of catching up to do.  But for now, I will post a little about my crochet project.  I am still working hard to complete a bedroom set and it is slowly coming together piece by piece.  Between gardening and spring, my crocheting has slowed down a bit due to a few nice days here and there.  Also, I have been in a bit of a funk lately.  I think all the world events kind of got to me some along with spending too much time on Facebook when I had free time instead of being creative.  There simply were too many in your face type posts where everyone has a strong and many times unpleasant opinion on everything, and even strong opinions on the least offensive things... and you NEED to know it because people these days are in your face regardless if you want to know or not.  Multiply that time whatever amount of your hundreds of friends and it was too much. I unplugged and have been decompressing and spending that time thinking about my diet/working out and happier things, and my creative juju is returning.    As you can see in the above photo I got the second pillow finished for my bed.


As you can see they both button up the back.  Forgive the crinkles as I was not careful to straighten it out before taking the photo and for now, there are some pretty old and lumpy pillows in those covers.  I need to go purchase a few new ones, as these pillows never get used and are more just there to take up space when the bed is made.


Here they are on the bed and the bedroom set is not complete.  The cat is sleeping on the ripple blanket that I have folded up on the edge of the bed for now.  Things will change.  Right now I am sleeping on a day bed but I have a bigger bed in storage.  Since it is just me sleeping in this bed, I have been keeping my queen size bed in storage and just using this one so there is more room in my bedroom.  The blanket is big enough to fit a larger bed and is currently tucked in on the back side.  The set has the busy bits completed...


I am currently working on the 3rd pillow but it is going to take me some time to complete.  Here is the stitch detail on the front of the bed pillow.  The back will be the same as the others.  I have no idea exactly what I will be doing other than the fact that it will have lots of flowers all over it in the same scraps that I used on the rest of the motifs for the bed.


If you go to Attic 24, Lucy has a wall decoration of a big flower and a stem with each leaf a different color.  Here is the beginning of one I am playing with.  I thought it would be cute to go with another flower instead of hers... but I am not sure of what I will do yet.


I have a box full of buttons and I might add these happy little bees buzzing around some of the flowers, but I am not sure yet.


I also have these happy little buttons of smiley happy flowers too! 

I am just going to continue on making things to put on the pillow to decorate it and see what it wants to be when it is finished.  Then I have 2 smaller 16x16 inch throw pillow blanks that I purchased and they too will go on the bed, along with a matching throw blanket.  

I have a long way to go but I am getting excited again... I can't wait to see what it will be when it is finished as I am flying with it all... 

I hope everyone is doing well and that you all are having a happy creative spring!  Which reminds me, I have a lot of flower and nature things to share soon.   Now that I am getting my juju back, I will catch up and I hope you like it.  

Until next time... xxxxxxxx